On completion of this stage you should be familiar with the following concepts:
|
Modeling notions: |
Perspectives |
|
Modeling techniques: |
Grouping views together |
|
Useful display templates: |
System (used to define perspectives) |
In the following stages we are going to model more views, in addition to the three already modeled. The additional views will be used by the purchaser and the shipping clerk. It would be a good idea to organize and group the views according to the different roles of users: Employee, Manager, and Purchaser.
This stage’s modeling should be performed in the Tutorial 8-9 project, you imported at the end of the previous stage.
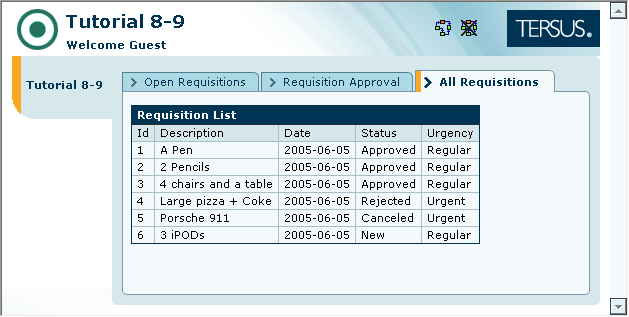
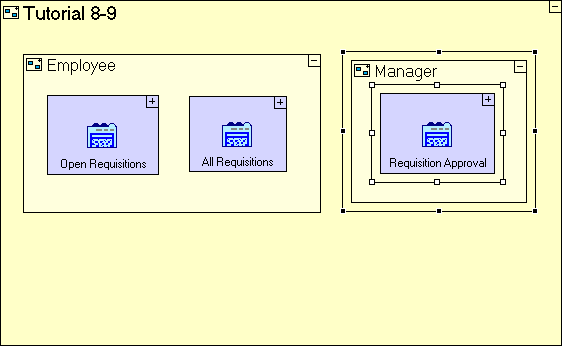
The application currently looks as follows:
The three views, Open Requisitions, Requisition Approval, and All Requisitions, are grouped together. We would like to group them so that Open Requisitions and All Requisitions (used by all employees) are separated from Requisition Approval (used by managers), as in the following screenshot:

The main visual difference between the two screen shots is the use of multiple Perspectives, appearing as tabs vertically on the left side of the screen (two in this case: Employee and Manager).
Perspectives are used to group together multiple views. The default behavior, for views not defined in a perspective, is to group all views in a single perspective whose name is the root model name (in our case, Tutorial 8-9 - as demonstrated in the first screen shot).
Do the following to define the Employee perspective:
Zoom to the Tutorial 8-9 root model.
Add a Basic/System
template (![]() ).
Name it Employee.
).
Name it Employee.
Zoom into the Employee system.
Drag the Open Requisitions view and the All Requisitions view from the repository (or outline) into the Employee system.
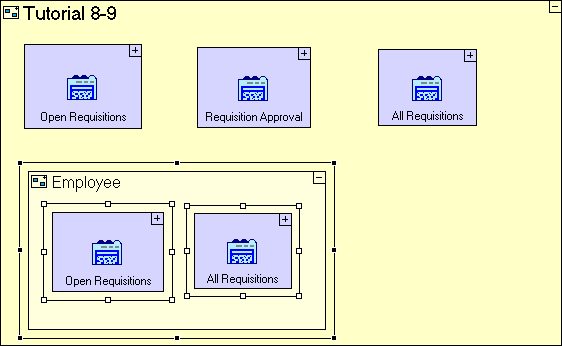
The model should look as follows.
Save your work and view the application in the browser. The application should look as follows:
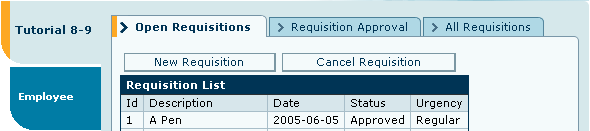
We have not removed the three views from the root model; therefore they still appear in a default perspective named after the root model.
Now, click on the new Employee perspective.
You should see the following:
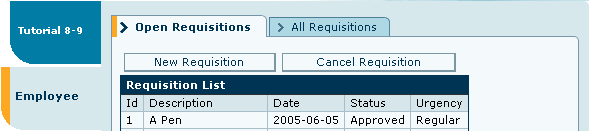
The Employee perspective is defined correctly.
The application model as it is now defined demonstrates the fact that views, as with other model types may be reused in an application (in the case of views, reusing across perspectives).
To remove the default perspective, Tutorial 8-9, do the following:
Zoom to the Tutorial 8-9 root model.
Select each of the three views Open Requisitions, Requisition Approval, and All Requisitions and delete them from the view.
We have deleted the Requisition Approval view from its parent model. This is not a problem, since the Requisition Approval model remains in the repository.
Last, let’s create the Manager perspective.
Do the following to define the Manager perspective:
Zoom to the Tutorial 8-9 root model.
Add a Basic/System template. Name it Manager.
Zoom into the Manager system.
Drag the Requisition Approval view from the repository into the Manager system.
The model should look as follows.
Save your work and view the application in the browser. The application should look as follows:
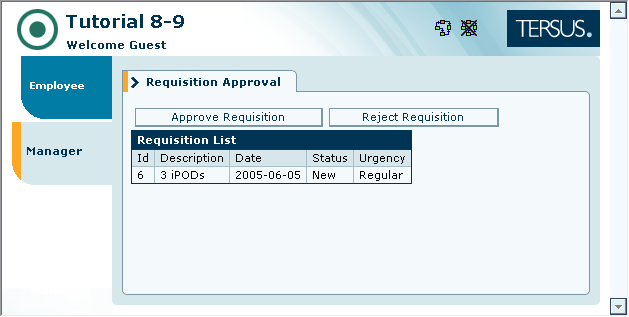
The grouping of views into perspectives may later be used in conjunction with the built-in support for a User/Permissions system to specify which perspectives are displayed after a user logs in to the system.
Import the sample project Tutorial 9-10 and use it as the basis for the next stage of the Tutorial 8-9.
For a reminder on how to import a sample project, see the Importing a Sample Project section at the end of Stage 2.
This sample project contains all the functionality modeled thus far.
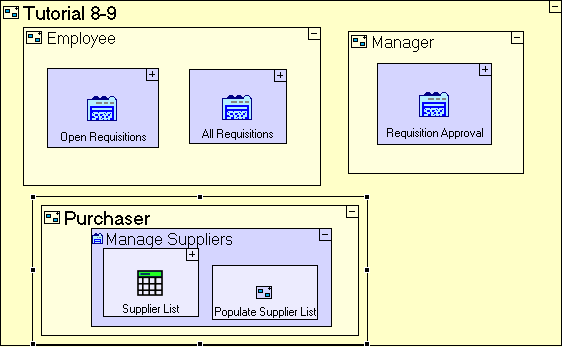
The sample project also includes additional functionality as follows:
1. Add a new Purchaser perspective and a Manage Suppliers view, containing a table and a “Populate” process.
|
How to Model |
Located in |
|
Add a Basic/System. Name it Purchaser. |
Tutorial 8-9 root |
|
Add a Display/View. Name it Manage Suppliers. |
Purchaser system |
|
Add a Display/Simple Table. Name is Supplier List. Add a Basic/Action. Name it Populate Supplier List. |
Manage Suppliers view |
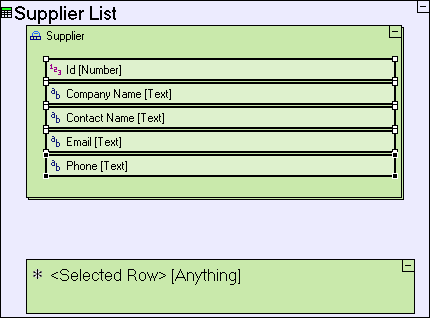
2. Define a new database table, Supplier.
|
How to Model |
Located in |
|
Add a Data Types/Database Record. Name it Supplier. Set it to repetitive. |
Supplier List table |
|
Add the following fields (data type in parentheses): Id (Number) Company Name (Text) Contact Name (Text) Email (Text) Phone (Text) |
Supplier data structure |
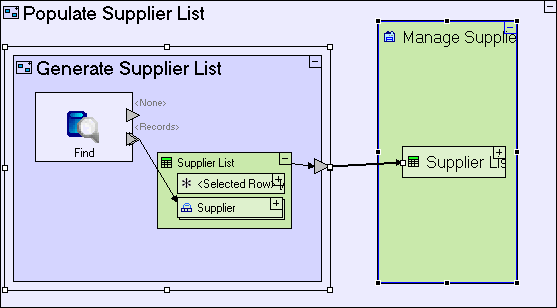
3. Model the Populate Supplier List process to initiate the display of the suppliers list
|
How to Model |
Located in |
|
Add Basic/Action. Name it Generate Supplier List. Add an exit to it. Add an ancestor reference of Manage Suppliers view. Link the Generate Supplier List exit to Manage Suppliers/Supplier List. |
Populate Supplier List process |
|
Add Database/Find. Reuse the Supplier List display as a data structure by dragging it from repository/outline. Link Find/<Records> to Supplier List/Supplier. Link Supplier List to the Generate Supplier List exit |
Generate Supplier List process |
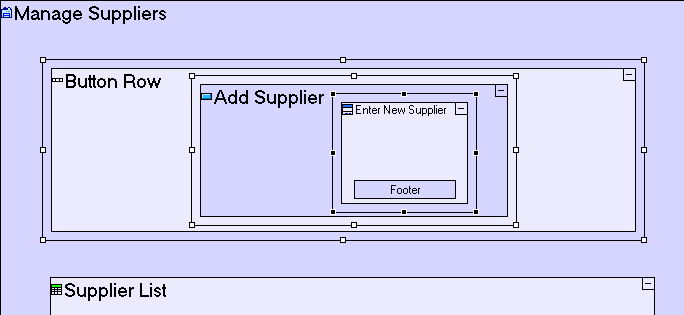
4. To Manage Suppliers view, add a Button Row with an Add Supplier button containing a Enter New Supplier popup.
|
How to Model |
Located in |
|
Add Display/Row. Name it Button Row. |
Manage Suppliers view |
|
Add Display/Button. Name it Add Supplier. |
Button Row |
|
Add Display/Popup. Name it Enter New Supplier. |
Add Supplier button |
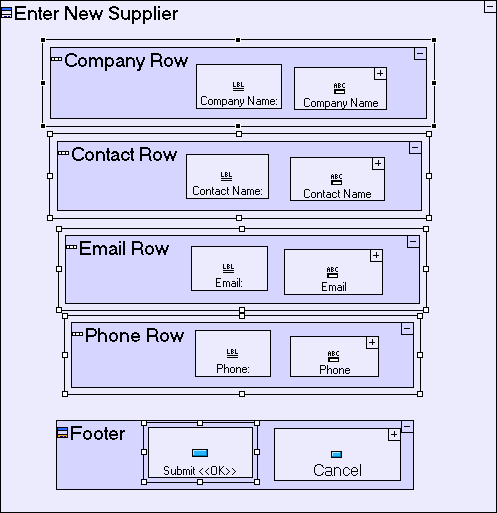
5. Add display elements to the Enter New Supplier popup.
|
How to Model |
Located in |
|
Add the following display elements (template in parentheses): Company Row (Row) Company Name: (Label) Company Name (Text Input Field) Contact Row (Row) Contact Name: (Label) Contact Name (Text Input Field) Email Row (Row) Email: (Label) Email (Text Input Field) Phone Row (Row) Phone: (Label) Phone (Text Input Field) |
Enter New Supplier popup |
|
Rename OK button to Submit |
Footer footer |
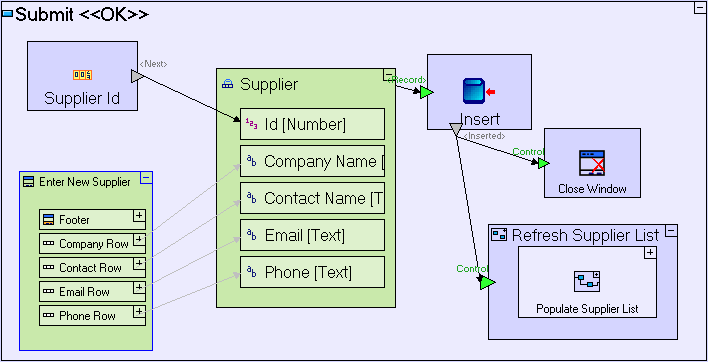
6. Implement the Enter New Supplier/Submit button (similar to the Enter New Requisition/Submit button we created in the beginning of the tutorial).
|
How to Model |
Located in |
|
Add an ancestor reference of Enter New Supplier popup. Add a Database/Sequence Number. Name it Supplier Id. Reuse the Supplier database record from the repository/outline. Link Supplier Id/<Next> to Supplier/Id Add the following flows (source in Enter New Supplier/Supplier List ancestor reference, target in Supplier data structure):
Add Database/Insert. Link Supplier data structure to Insert/<Record> Add Basic/Action. Name it Refresh Supplier List. Add a Control trigger to it. Link Insert/<Inserted> to the Refresh Supplier List/Control. Add Display Actions/Close Window. Add a Control trigger to it. Link Insert/<Inserted> to the Close Window/Control. |
Submit button |
|
Reuse Populate Supplier List from the outline/repository. |
Refresh Supplier List process. |
You may now proceed to Stage 10, in which we are going to model a process which imports a list of suppliers from an excel worksheet into the database.
Click here to open the live project in a separate window.